Atom is a free and open-source text editor developed by GitHub. It is available on macOS, Windows, and Linux. We can customize it to do anything we like to do. It can also be used as a source code editor. However, despite its official sunset, there is still a way to download Atom Editor.
Besides this, we can also add some additional features with a plug-in written in Node.js. In this article, we will discuss; how to download and install Atom Editor on Windows 11. You can also check our guide on; how to install Sublime Text 4 on Windows 11.
How to Download and Install Atom Editor on Windows 11
Here, we will discuss; the steps to download and install the Atom Editor on Windows 11. So, just follow the steps mentioned below:
1. Open any browser, search for Atom Editor, and open the link from atom.io.
2. It will redirect you to the GitHub repository. Here, you’ll get all the information and features about the Atom Editor.
Note: GitHub has archived the Atom Editor and all projects under the Atom organization as part of an official sunset on December 15, 2022. You can download the older version of Atom from the GitHub repository.
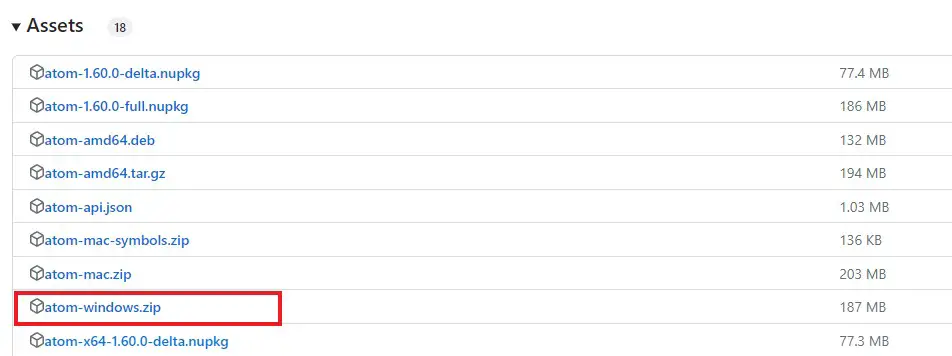
3. Now to download the latest version of Atom Editor for Windows 11, click on the atom-windows.zip option.
4. After the download is complete, extract the .zip.
5. To extract the zip files on Windows OS, you can use tools like WinZip, WinRAR, and 7-Zip.
6. Now, open the atom-windows folder and Atom folder.
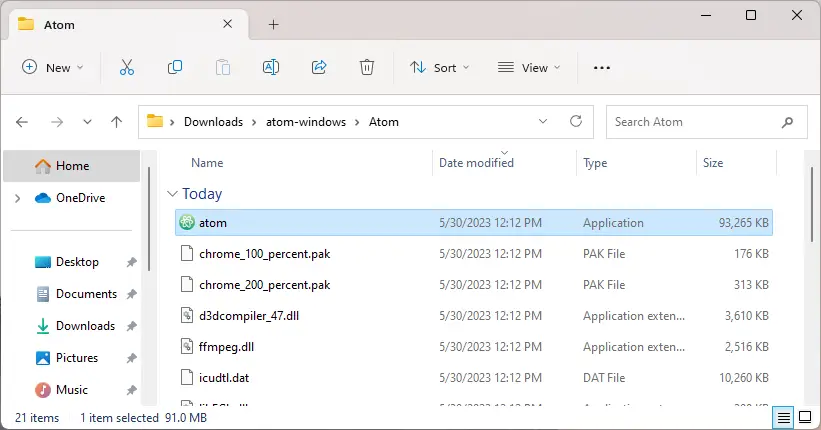
7. After that, run the Atom application to install it.
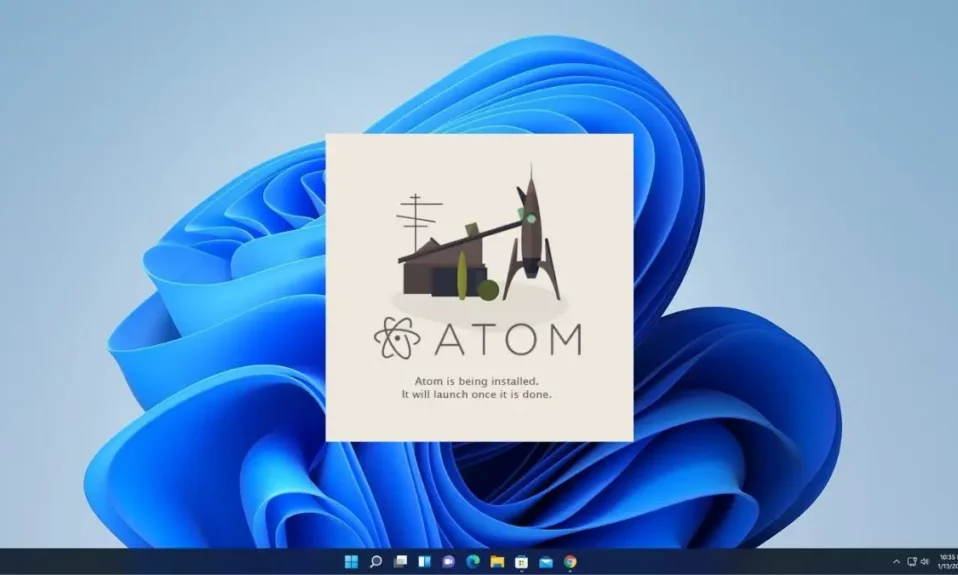
8. It will open the installation wizard. Here, you don’t need to do anything. It will automatically install and open the Atom Editor on your device.

That’s it; this is how you can download and install the Atom editor on Windows 11. Since Atom is officially sunset, you will not be able to utilize all projects under the Atom organization.
How to Install Packages and Themes to Atom
Atom has a huge variety of packages and themes you can install if you want to add more features to Atom Editor. Then you can install packages and themes.
There are two ways; by which you can install packages and themes to the Atom Editor. You can install packages and themes from the official website. Or, you can install them via the Atom Editor software.
Let me show you the simplest way to install packages and themes. For that, follow these steps:
1. Open the Atom Editor.
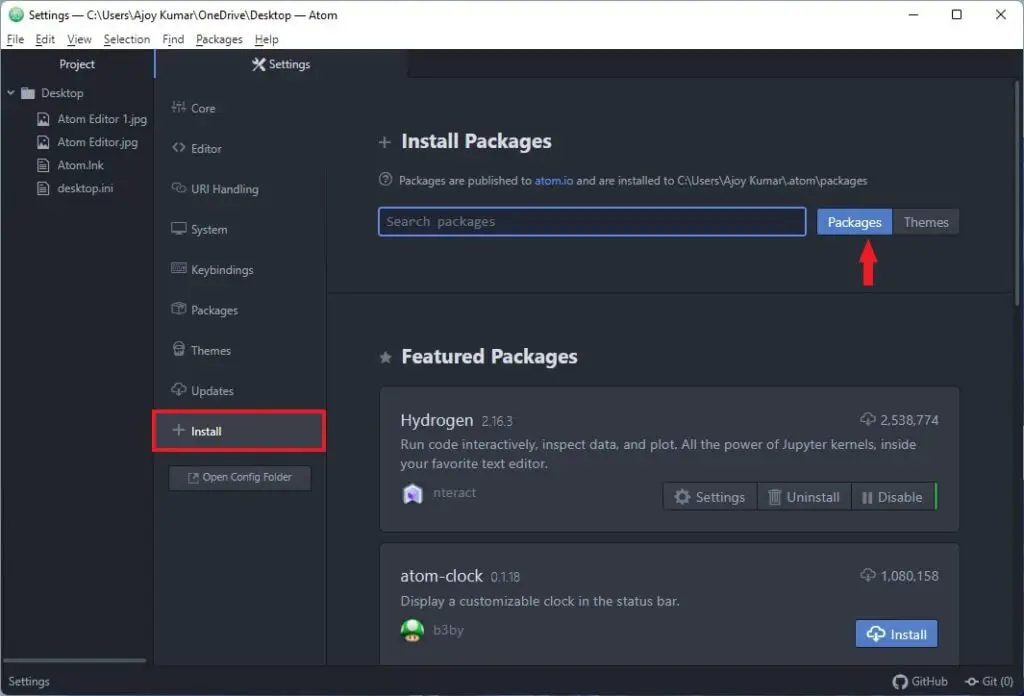
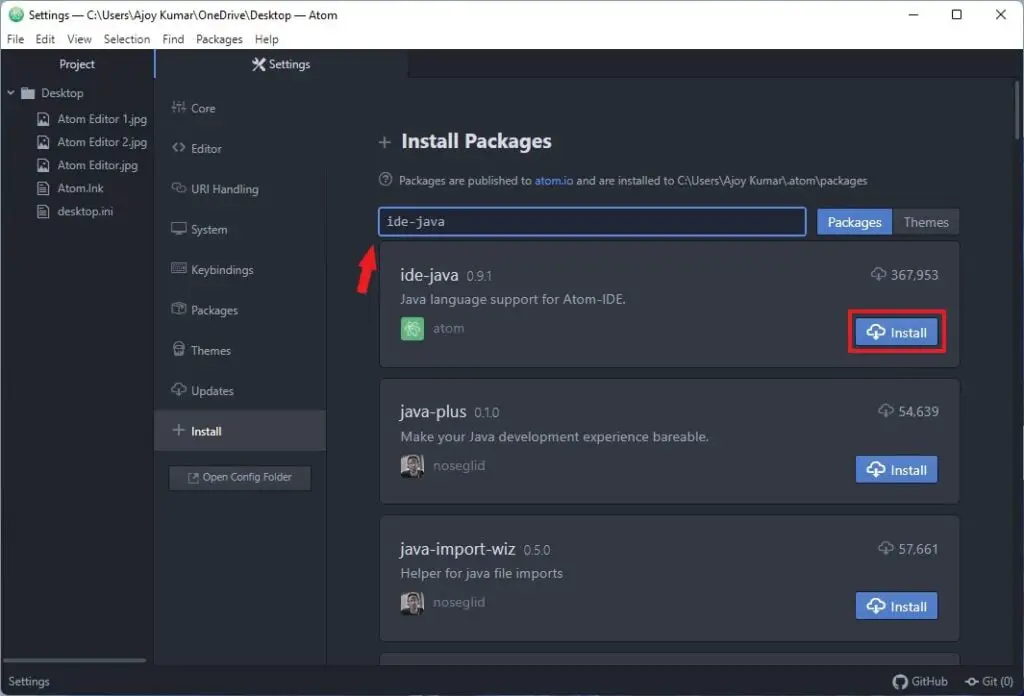
2. Go to Files > Settings > Install. Here, you will find a search option. You can search for the packages and themes.
3. To search for packages, simply click on the Packages button. For themes; click on the Themes button.
4. Say, for example, you want to add Java support to Atom Editor then you can search for the ide-java package.
5. Now to install the package, select a package and then click on the Install button the install it. Similarly, you can install themes on Atom Editor.
6. Now to check the installed packages and themes, Go to Files> Settings>Packages or Themes option.
7. Here, you’ll find the list of packages and themes, if you want to remove some packages and themes then you can uninstall them from here.

Conclusion
That’s it; this is how you can download and install Atom Editor on Windows 11. You can also check our detailed guide on; how to set up Atom Editor for Python on Windows 11 for Python programming.
I hope this article was helpful to you. If you liked the article, share it with your friends and family. If you have some suggestions, do not hesitate to leave them in the comments section below. We will surely reply to you.