The latest version of Java JDK does not include JRE (Java Runtime Environment) by default. You need to install it separately on your Windows system. However, if you have installed Java SE Development Kit 8, then it comes with JRE 8 included.
For other versions of Java JDK, you have to install JRE separately. You can download the JRE from the official Oracle website. So, let’s start without any delay.
How to Install Java JRE in Windows 11
Before you install Java JRE, you have to install and set up Java JDK on your system. After you have installed it, you can follow the below-mentioned steps to download and install Java JRE:
1. Open any browser and visit the Oracle website.
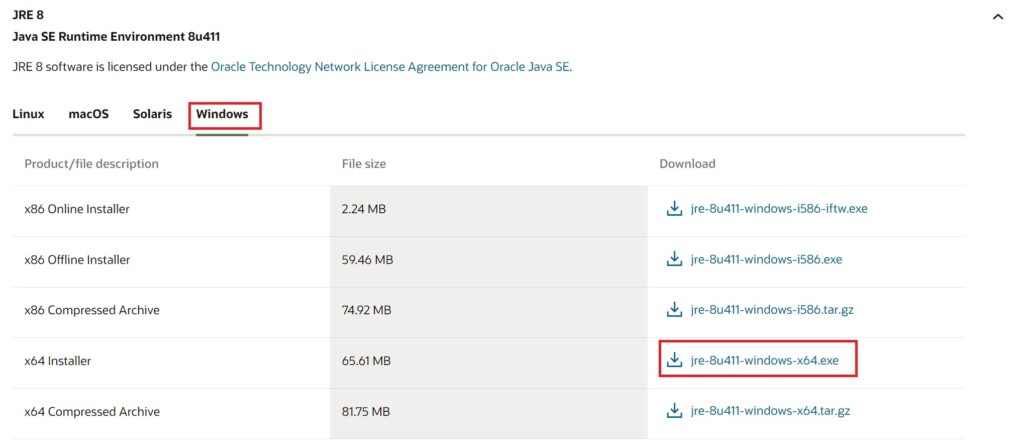
2. Then, select the Java SE Development Kit 8u411 and choose the Windows operating system.
3. After that, click on the download link based on your system architecture.
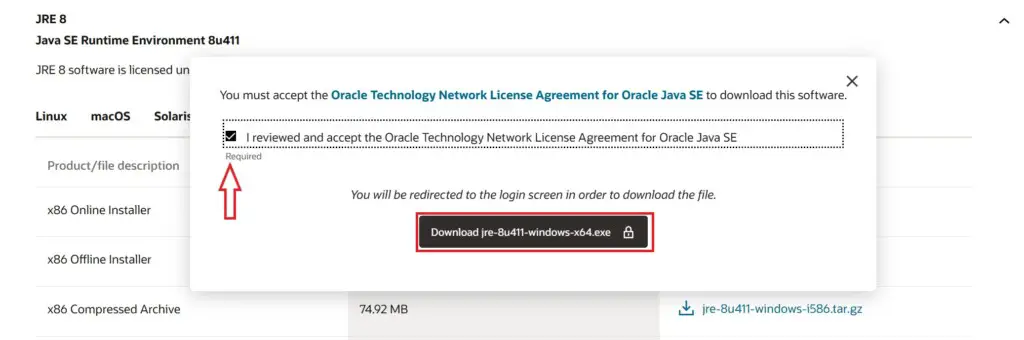
4. Now, to download the installer file, accept the Oracle Technology Network License Agreement for Oracle Java SE and click on the download button.
5. After that, it will redirect you to the Oracle login page. Here, log in with your Oracle account. If you don’t have one, you can create an Oracle account for free.
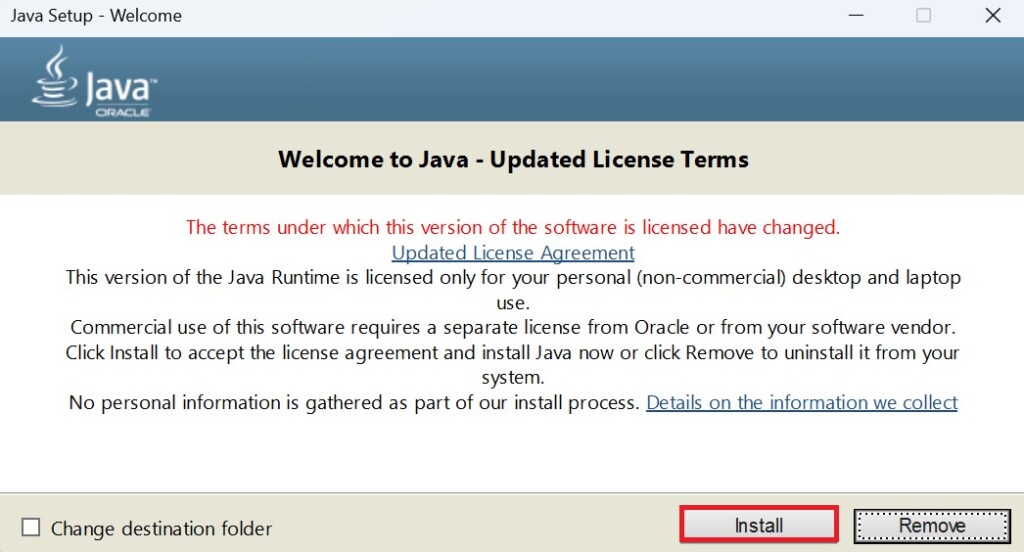
6. Once you have downloaded the installer file, open it and click on the Install button.
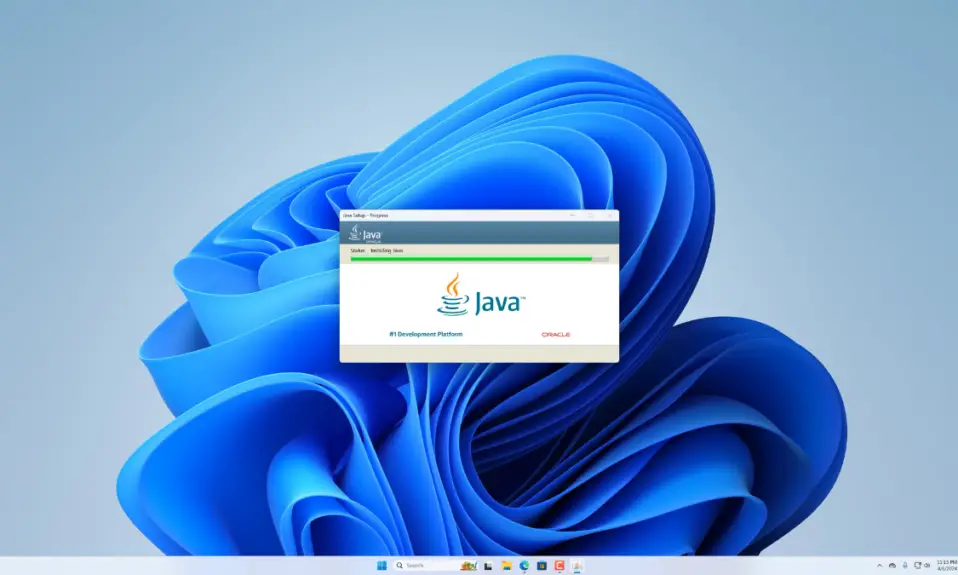
7. Then, wait for the installation process to complete.
How to Setup Java JRE in Windows 11
After you have installed the Java JRE in Windows 11, you have to add the JRE installation folder location to the environment variable.
For that, follow the following steps:
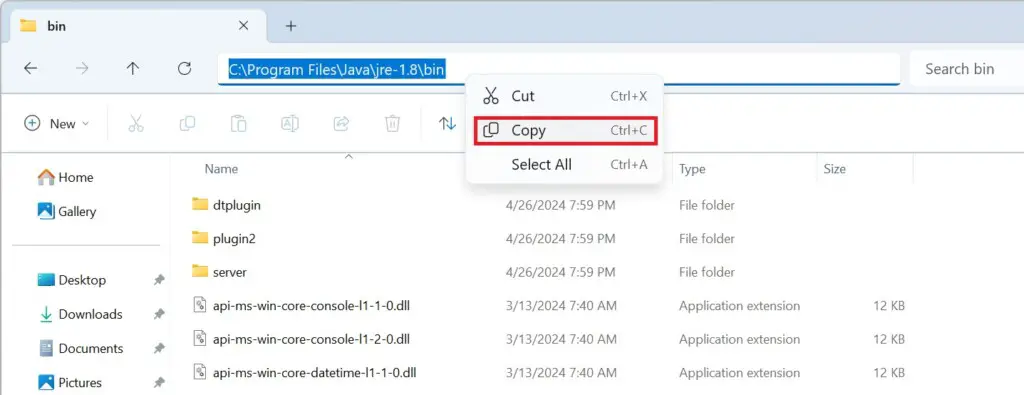
1. Open the File Explorer and navigate to this location: C:\Program Files\Java.
2. Then open the JRE folder and look for the bin folder, open it, and copy the path.
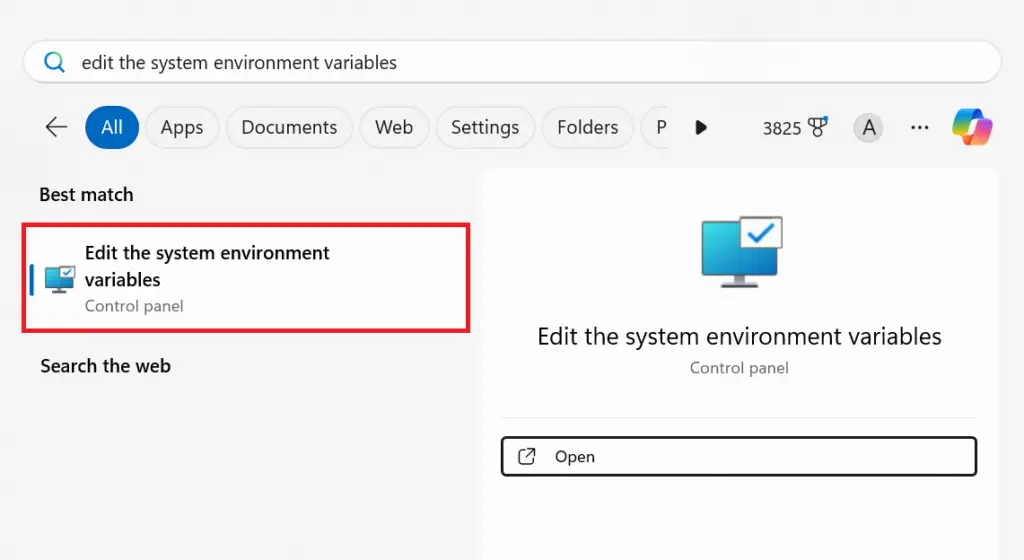
3. Now, in the Windows search, type Edit the system environment variables and open it.
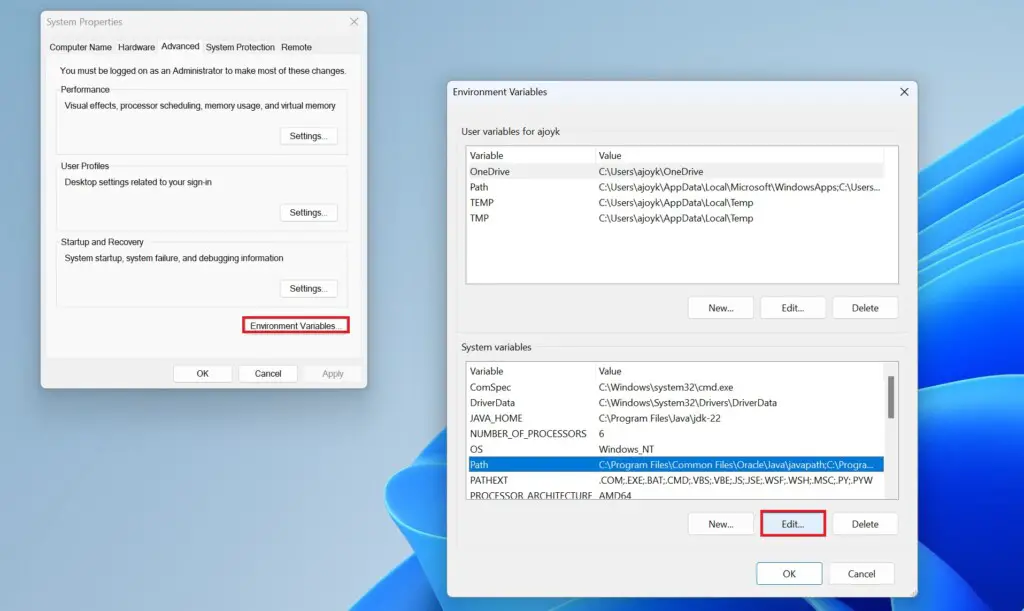
4. It will open the System Properties window. Here, click on the Environment Variables button.
5. Then it will open the Environment Variables option. Under the System Variables section, look for the Path variable, select it, and click on the Edit button.
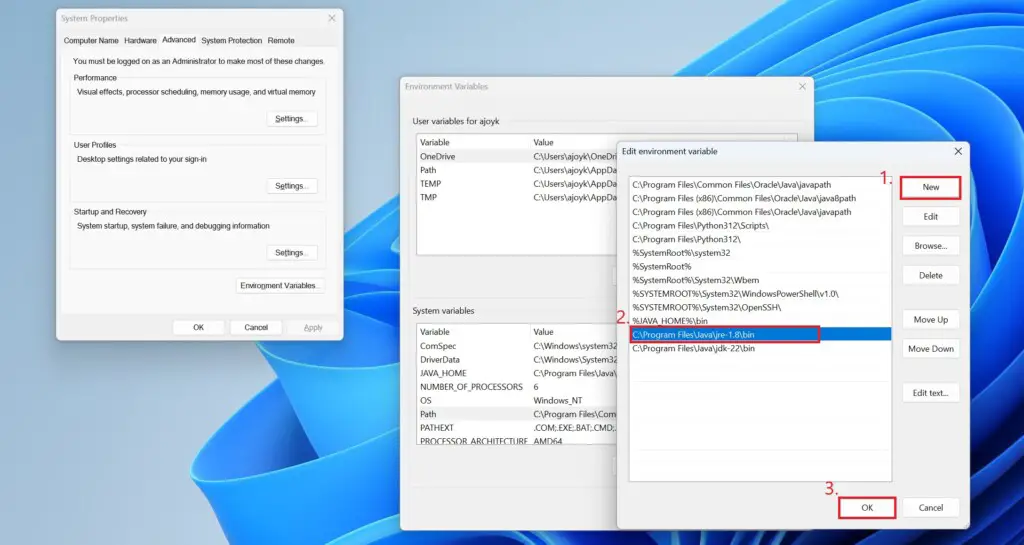
6. On the Edit Environment Variable window, click on the New button and paste the JRE bin folder path location.
7. Then, click on the OK button to save the changes.
Conclusion
That’s it. You have successfully installed and set up Java JRE on Windows 11. However, if you are still experiencing issues related to Environment Variables then you can check out our detailed guide on setting up environment variables for Java in Windows 11.