If you want to learn C Programming and C++, then CodeBlocks is the IDE for you. CodeBlocks is a free and open-source cross-platform Integrated Development Environment (IDE) specially designed for C Programming, C++, and Fortran. CodeBlocks supports multiple compilers, including GCC and G++. You can even add various plugins to enhance its capabilities and features.
Hopefully, you now have a better understanding of the CodeBlocks IDE. In this article, we will guide you through the process of downloading and installing the CodeBlocks IDE on Windows, complete with GCC and G++ compilers. So, without ado let’s get started.
How to Download CodeBlocks IDE for Windows
You can download the CodeBlocks IDE for the Windows operating system from the official website. Here are the steps to download the latest version of CodeBlocks for Windows 11:
1. Open any browser, search for CodeBlocks, and open the link from codeblocks.org to download the CodeBlocks IDE.
2. Click on Download from the menu. On the download page, you will find three options to download the binary release, the source code, and Retrieve the source code from SVN.
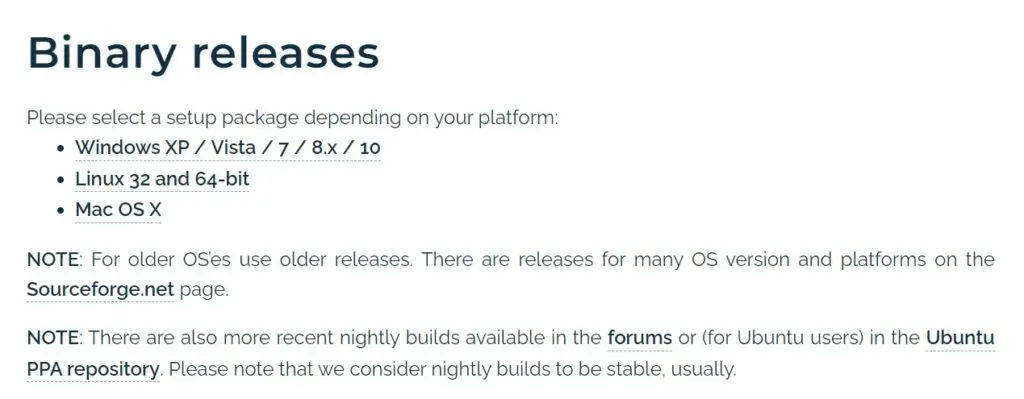
3. To download CodeBlocks with GCC and G++ compilers just click on Download the binary release.
4. Now, it is time to download the file. For that select your operating system and download the codeblocks-20.03mingw-setup.exe file from Sourceforge.net.
How to Install CodeBlocks IDE for C and C++ on Windows 11
After the download has been completed, you can follow the steps below to install the CodeBlocks IDE on Windows 11 for C/C++ programming.
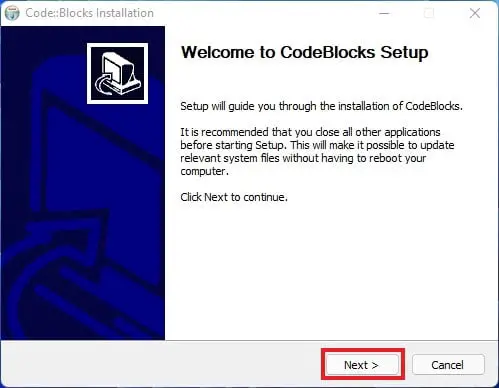
1. Open the downloaded file and permit Windows to install CodeBlocks IDE.
2. It will open the Installation window. Here, click on the Next button.
3. After that, you have to accept the license agreement. For that, click on I Agree.

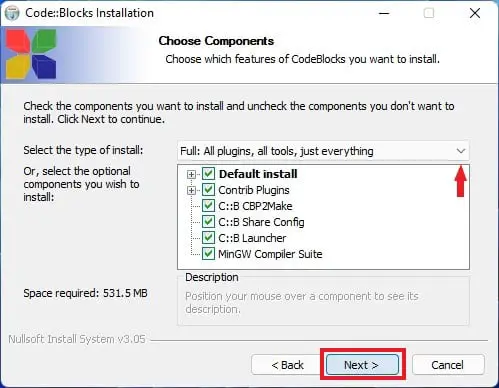
4. Select the components you wish to install and deselect the components you don’t want to include, then click Next to proceed.
Note: We suggest installing all the plugins and tools for the CodeBlocks IDE.
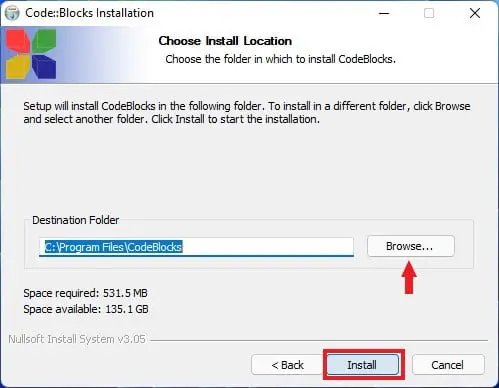
5. Now, choose the location where you want to install the CodeBlocks IDE. To change the default location, click on the Browse button, and then click on Install.
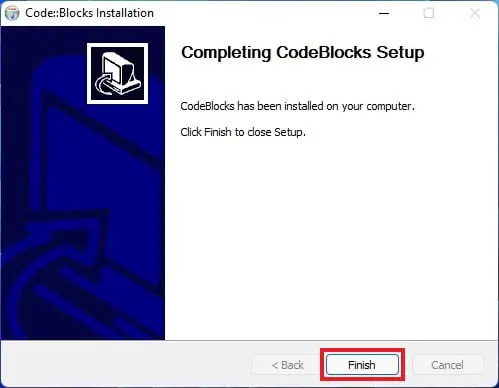
6. Installation will take some time to complete. After the installation is complete click on Next and finally click on Finish.
That’s it; this is how you can download and install CodeBlocks on Windows 11. Now, if you want to create C programs, please continue reading this article until the end.
How to Create First C Program using CodeBlocks IDE
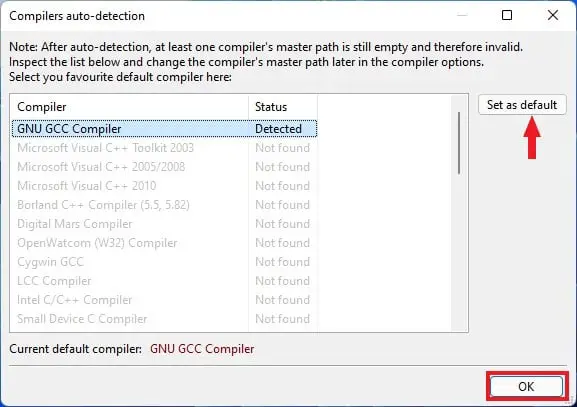
Before creating C and C++ programs in CodeBlocks IDE, we need to set up the GNU GCC Compiler as the default compiler. You will be prompted to do this when you open CodeBlocks IDE for the first time. Afterward, you can start creating C and C++ programs.
Here are the steps to create your first C Program using CodeBlocks IDE:
1. Open CodeBlocks IDE and click on Set as Default to set the GNU GCC Compiler as the default compiler.
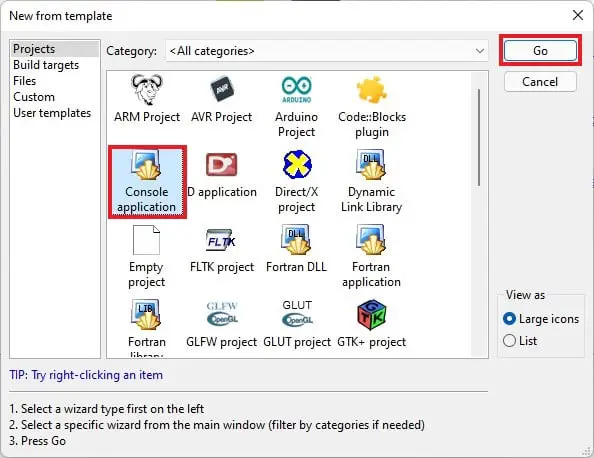
2. Click on File > New > Project and select Console Application. After that, click on Go.
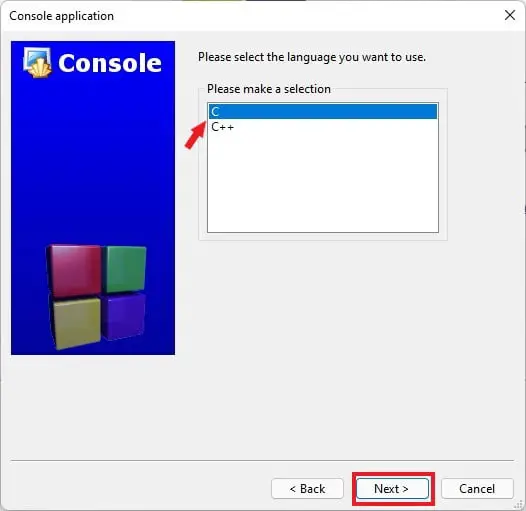
3. Now, click on Next and select the language you want to use. Since we are going to create a C program, select C, and then click Next.
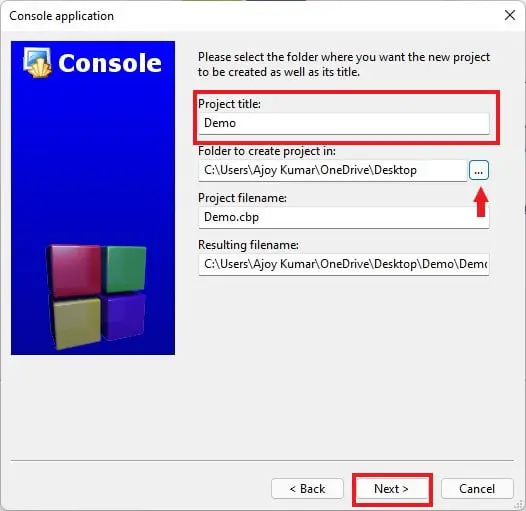
4. Name your project title, and project filename, and select the location where you want to save your C program files.
5. Then click on the Next button.
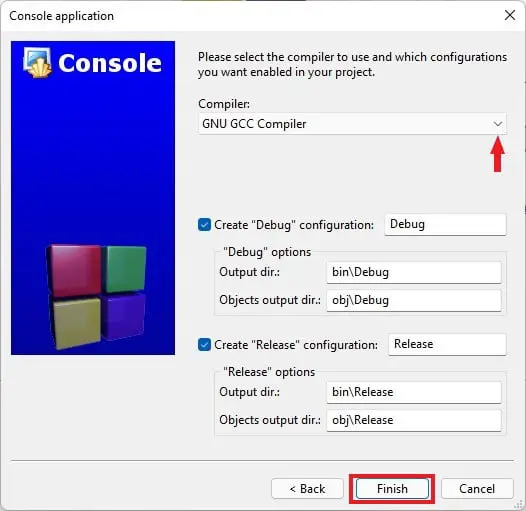
6. After that, select the compiler you to want use from the drop-down menu and choose the configuration you want to enable in your Project, then click Finish.
Note: Our suggestion is to choose GNU GCC Compiler and keep other options as default.
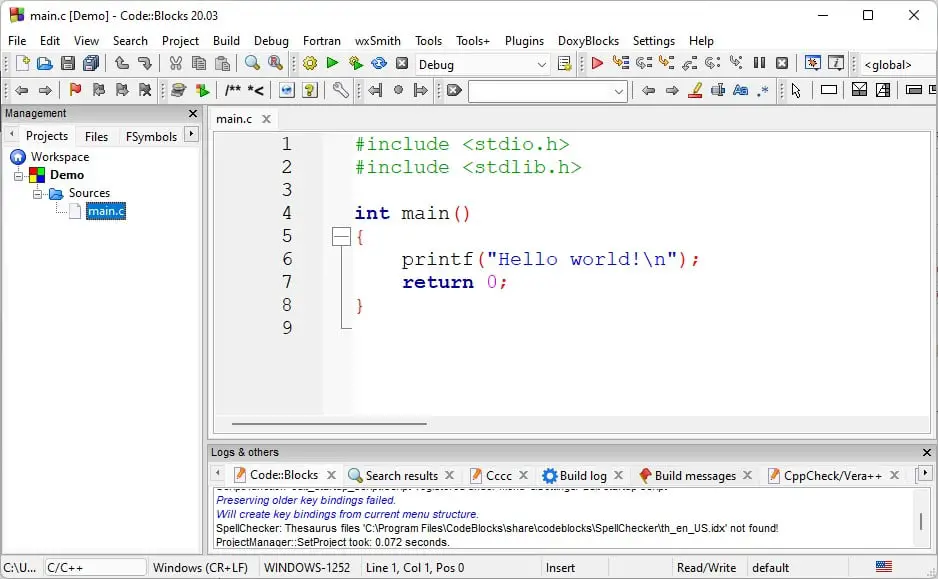
7. You will find your main.c file on the project manager, and now you’re ready to code.
8. To run your C program click on Build > Build and Run or you can use shortcut key F9.
Conclusion
That’s it; this is how you can install CodeBlocks on Windows 11 and create your first C Program. If you’re interested in C programming, we recommend watching C Programming Tutorials.
We hope this guide has helped you install CodeBlocks IDE on your Windows 11 computer. If you have any questions or need assistance with anything related to CodeBlocks, please leave a comment and let us know. We are here to help you!